up-fw
UPLOAD LATEST FIRMWARE ONTO LUMINOUSBEE
- Install Mission Planner on your computer:
Mission Planner is a full-featured ground station application for the ArduPilot open source autopilot project. It is compatible with Windows only. Mission Planner can be used as a configuration utility or as a dynamic control supplement for your autonomous vehicle. Here are just a few things you can do with Mission Planner:
- Update the firmware (the software) into the Luminousbee.
- Setup, configure, and tune your vehicle for optimum performance.
- Plan, save and load autonomous missions into you autopilot with simple point-and-click way-point entry on Google or other maps.
- Download and analyze mission logs created by your autopilot.
- Interface with a PC flight simulator to create a full hardware-in-the-loop UAV simulator.
- With appropriate telemetry hardware you can:
- Monitor your vehicle’s status while in operation.
- Record telemetry logs which contain much more information the the on-board autopilot logs.
- View and analyze the telemetry logs.
- Operate your vehicle in FPV (first person view)
If you do not already have Mission Planner installed on your computer, download the latest version directly by clicking on this link:
From this link you can download our latest firmware
3. Connect your drone to the computer via USB and to Mission Planner:
After downloading and installing the latest version of Mission Planner from the above link, it is now time to connect your drone to the PC via USB.
Connect your drone to a USB port on your computer, as soon as you connect the drone to the USB port you should see the leds on the top of the drone turn on.
After connecting it, wait a few seconds and then start Mission Planner.
To connect to the drone via Mission Planner, select the com port with the description : “ArduPilot” and click “Connect“.
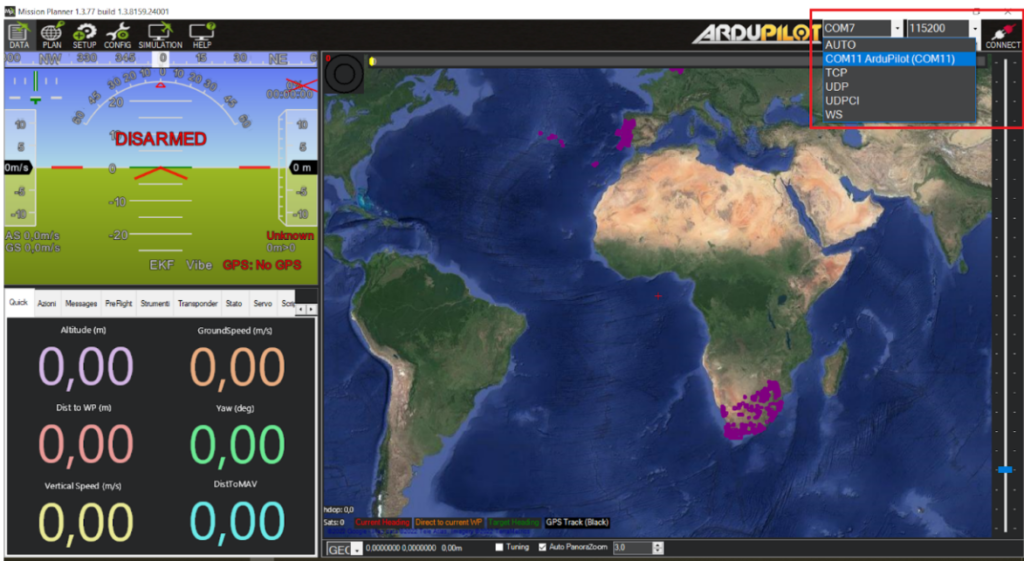
After a few seconds, Mission Planner should connect to your drone and the window in the top right-hand corner should look like this , (The com port name is variable, in your setting it will probably be different)

This means that your drone is connected to Mission Planner!
( COM 43 – 44 -QUADROTOR ) 43= COM PORT , 44 = ID OF DRONE , QUADROTOR = TYPE OF VEHICLE )
4. Save the parameter list :
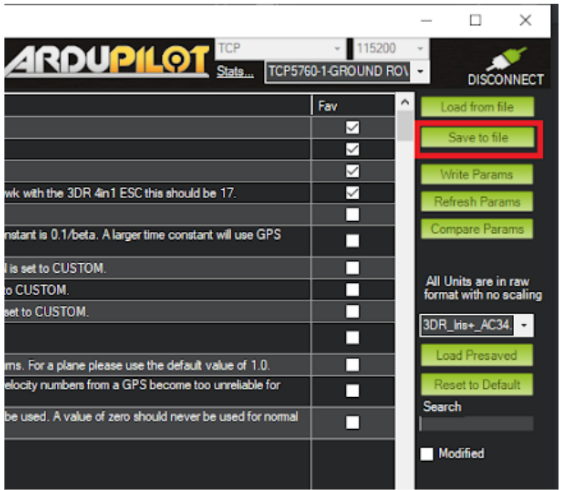
Before doing a firmware upload, make sure to create a backup copy of the parameter list present on the drone.
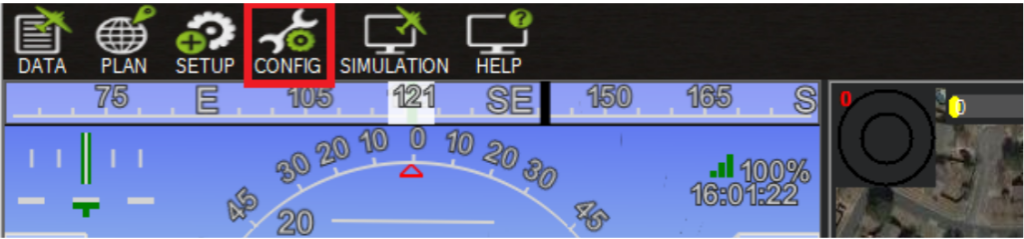
Click on the “CONFIG” button on the Mission Planner home page
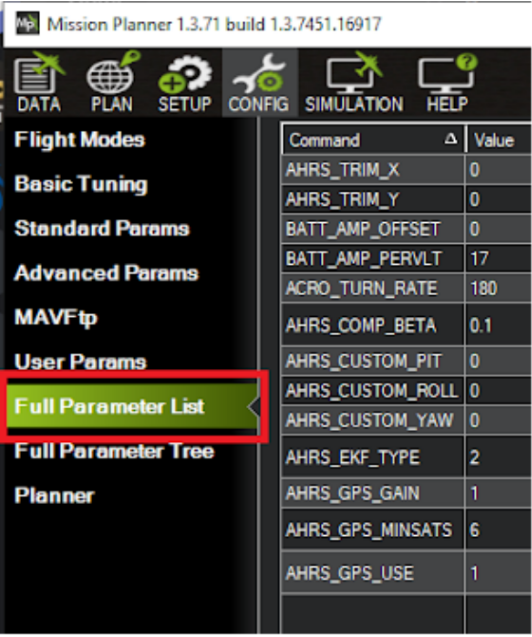
In the window that opens, select the item: “Full Parameter List“.
Click on the “Save to file” button. We recommend to save the parameter list in a folder called : /BCK_DRONE_ID/DRONE_ID.param
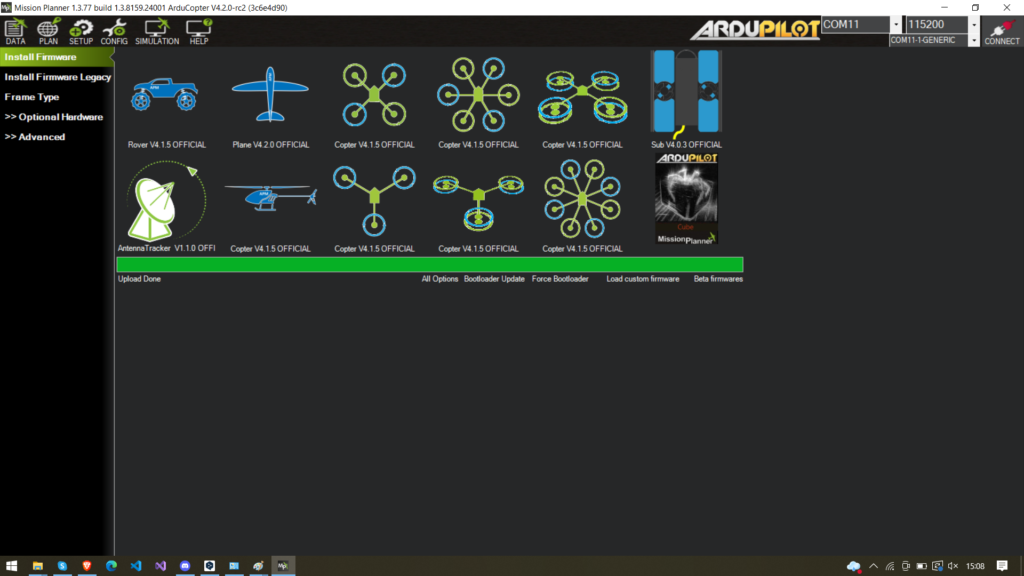
5.Upload firmware onto your drone:
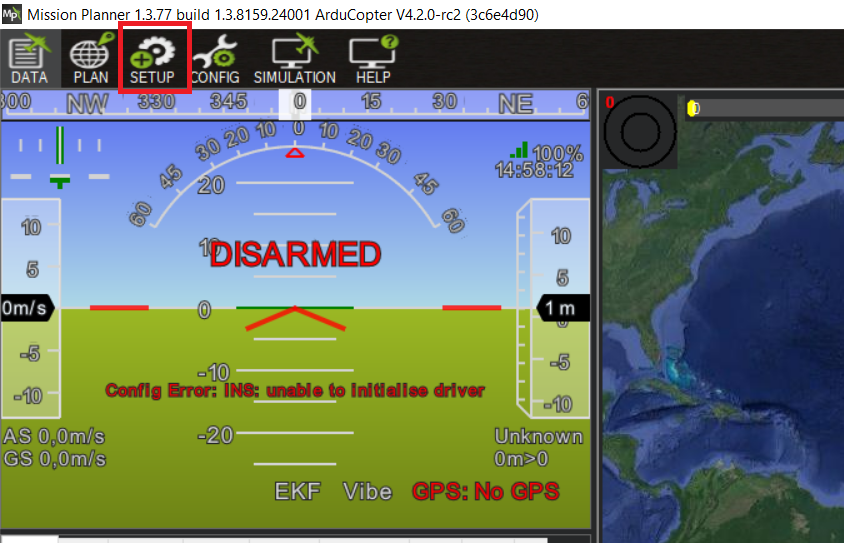
Click on the SETUP button on the main page of Mission Planner :
Click on “Install Firmware“.
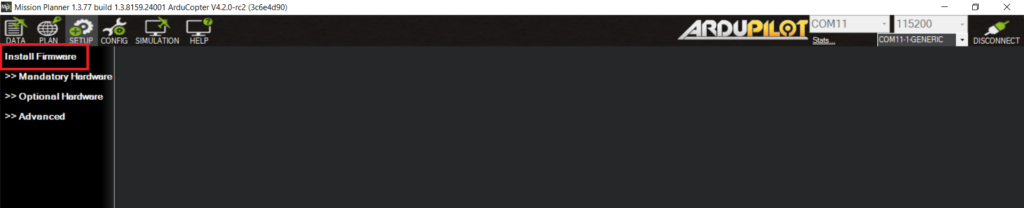
Then , if you are still connected to the drone, click “DISCONNECT“

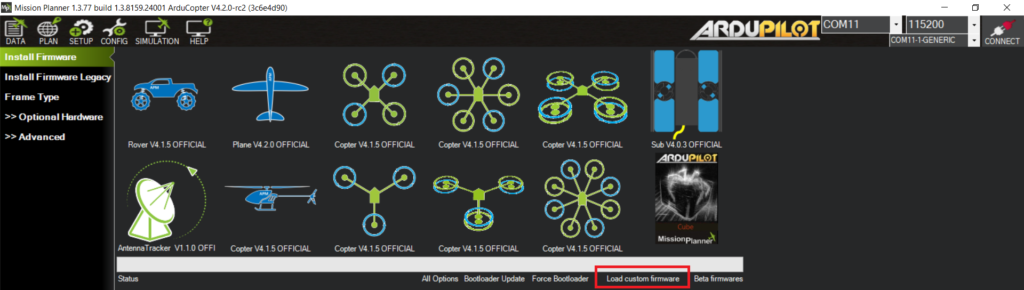
Now click on “Load custom firmware” and select the .apj firmware you previously downloaded from this site .
This message may occur :
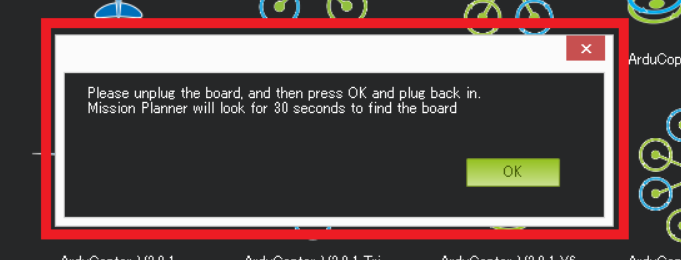
In this case, follow the instructions . Disconnect the drone’s USB cable
from the computer then press “OK” and then reconnect the USB cable.
If all goes well, a loading procedure should start, which includes (erase,program,Upload done):
The firmware will have been correctly loaded on the drone!
