setup-network
SET WIFI SETTINGS OF LUMINOUSBEES
INTRODUCTION :
To use our fleet of LuminousBees in conjunction with SkyBrush Suite, it is essential to create a wifi network first.
To this network all LuminousBees will be connected together with a PC ( Windows , Linux , MacOs ) that will manage the fleet.
Before moving on to the next paragraph, we strongly advise you to read these guides :
How to setup your Wi-Fi network
CONFIGURE LUMINOUSBEE FOR YOUR WIFI NETWORK :
Warning ! This procedure may take some time ! You will have to set the WiFi module (esp8266) on all LuminousBees
The esp8266 on our drones come with firmware modified specifically to work with Ardupilot and we keep it up-to-date.
Normally the esp8266 can works in 2 modes: AP (Access Point Mode) and STA (Station Point Mode):
- AP : The ESP8266 creates a wifi network to which other devices can connect. This mode is activated if the drone cannot find a network to connect to within 1 minute.
- STA : The ESP8266 connects to a network whose SSID and PASSWORD it has saved in his memory.
The procedure:
Turn on the drone you want to configure by activating the switch on one of its arms and wait ~ 1 min .
After about 1 minute a wifi network should have been created that has a default SSID and Password :
- SSID -> “Ardupilot” ( The ssid name depending on the drone id (ex.Drone id 35 = ArduPilot35) )
- Password -> “ardupilot”.
Connect to this wifi network and type in the browser’s search bar: ” 192.168.4.1 ” (this is the default address for the AP)
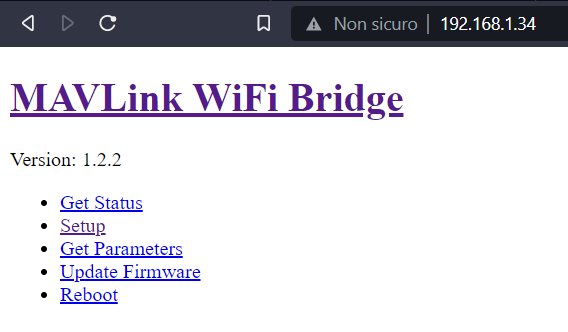
A webpage similar to this one should be presented, this is the homepage of mavesp8266 :

From here, click on Setup , and you will be taken to the Mavlink setup page.
You can change many parameters, but we are only interested in a few parameters :
- AP SSID : is the SSID that the drone will create in AP mode.
- AP PASSWORD : is the password to be entered to access the AP network.
- Station SSID : the SSID of the network to which the drone will connect.
- Station PASSWORD : The PASSWORD of the network to which the drone will connect.
- Station IP : This is the IP address with which the drone will be connected to the network.( It should already be set according to the id of the drone you are configuring )
* For the remaining parameters ( if they are different from the image below ) follow the image template and enter them
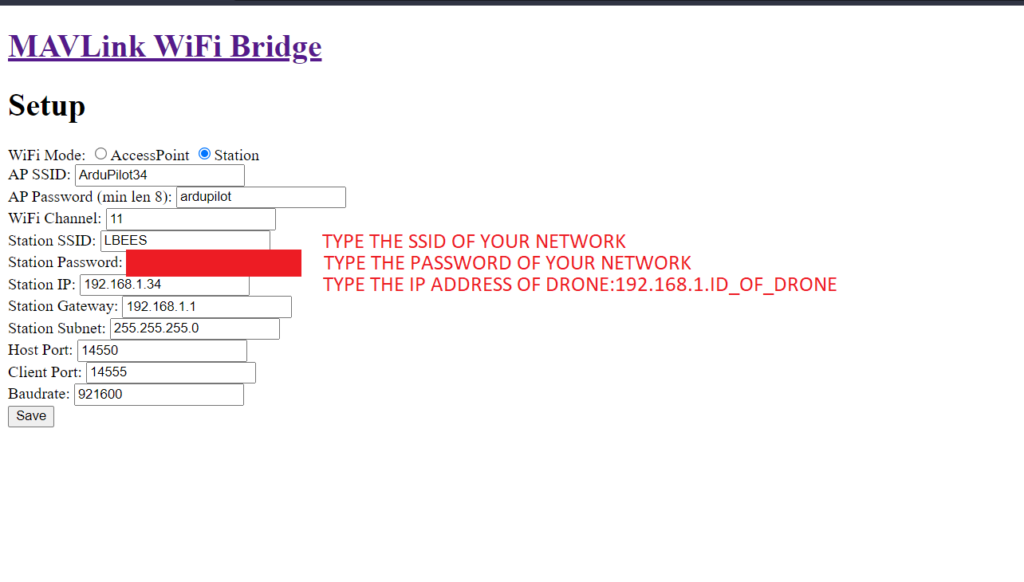
After entering the values ( Station SSID , Station Password , Station IP ) change the radio button to : Station, and click Save button.
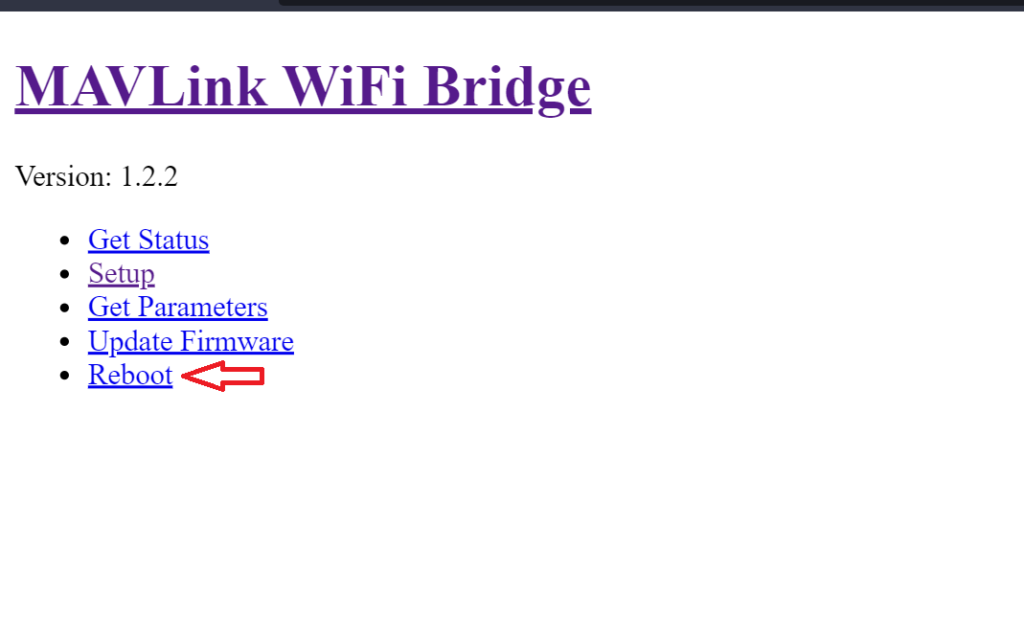
Now go back to the start page and click ‘Reboot‘ to reboot the esp8266. If the network you have set up is available, it will immediately connect to it. Otherwise, if it is not yet active, first activate the network and then turn on the drone.
Check if the drone has connected to the network you set:
To check that the drone has connected to the STATION network you set, connect to the STATION network with your computer and search in the browser’s search bar : 192.168.1.[the id of your drone]
This way you will know that the drone is connected to your wifi network, as you would have accessed the setting page by typing in the IP address (Station IP)
Connecting to a single drone with Mission Planner :
With the Mission Planner program you can also connect to the drone via WiFi (udp). This procedure is very simple
First of all, switch off the STATION network ! Otherwise the drone will connect to it . The drone must create the AP network for this procedure.
Turn on the drone then wait about a minute . Once again, a wifi network should be created with the name ” Ardupilot”. Connect to this network with credentials (AP SSID and AP Password) .
After connecting to the network, start Mission Planner . And it should automatically connect to the drone

You can now take advantage of all the functions of Mission Planner remotely !
